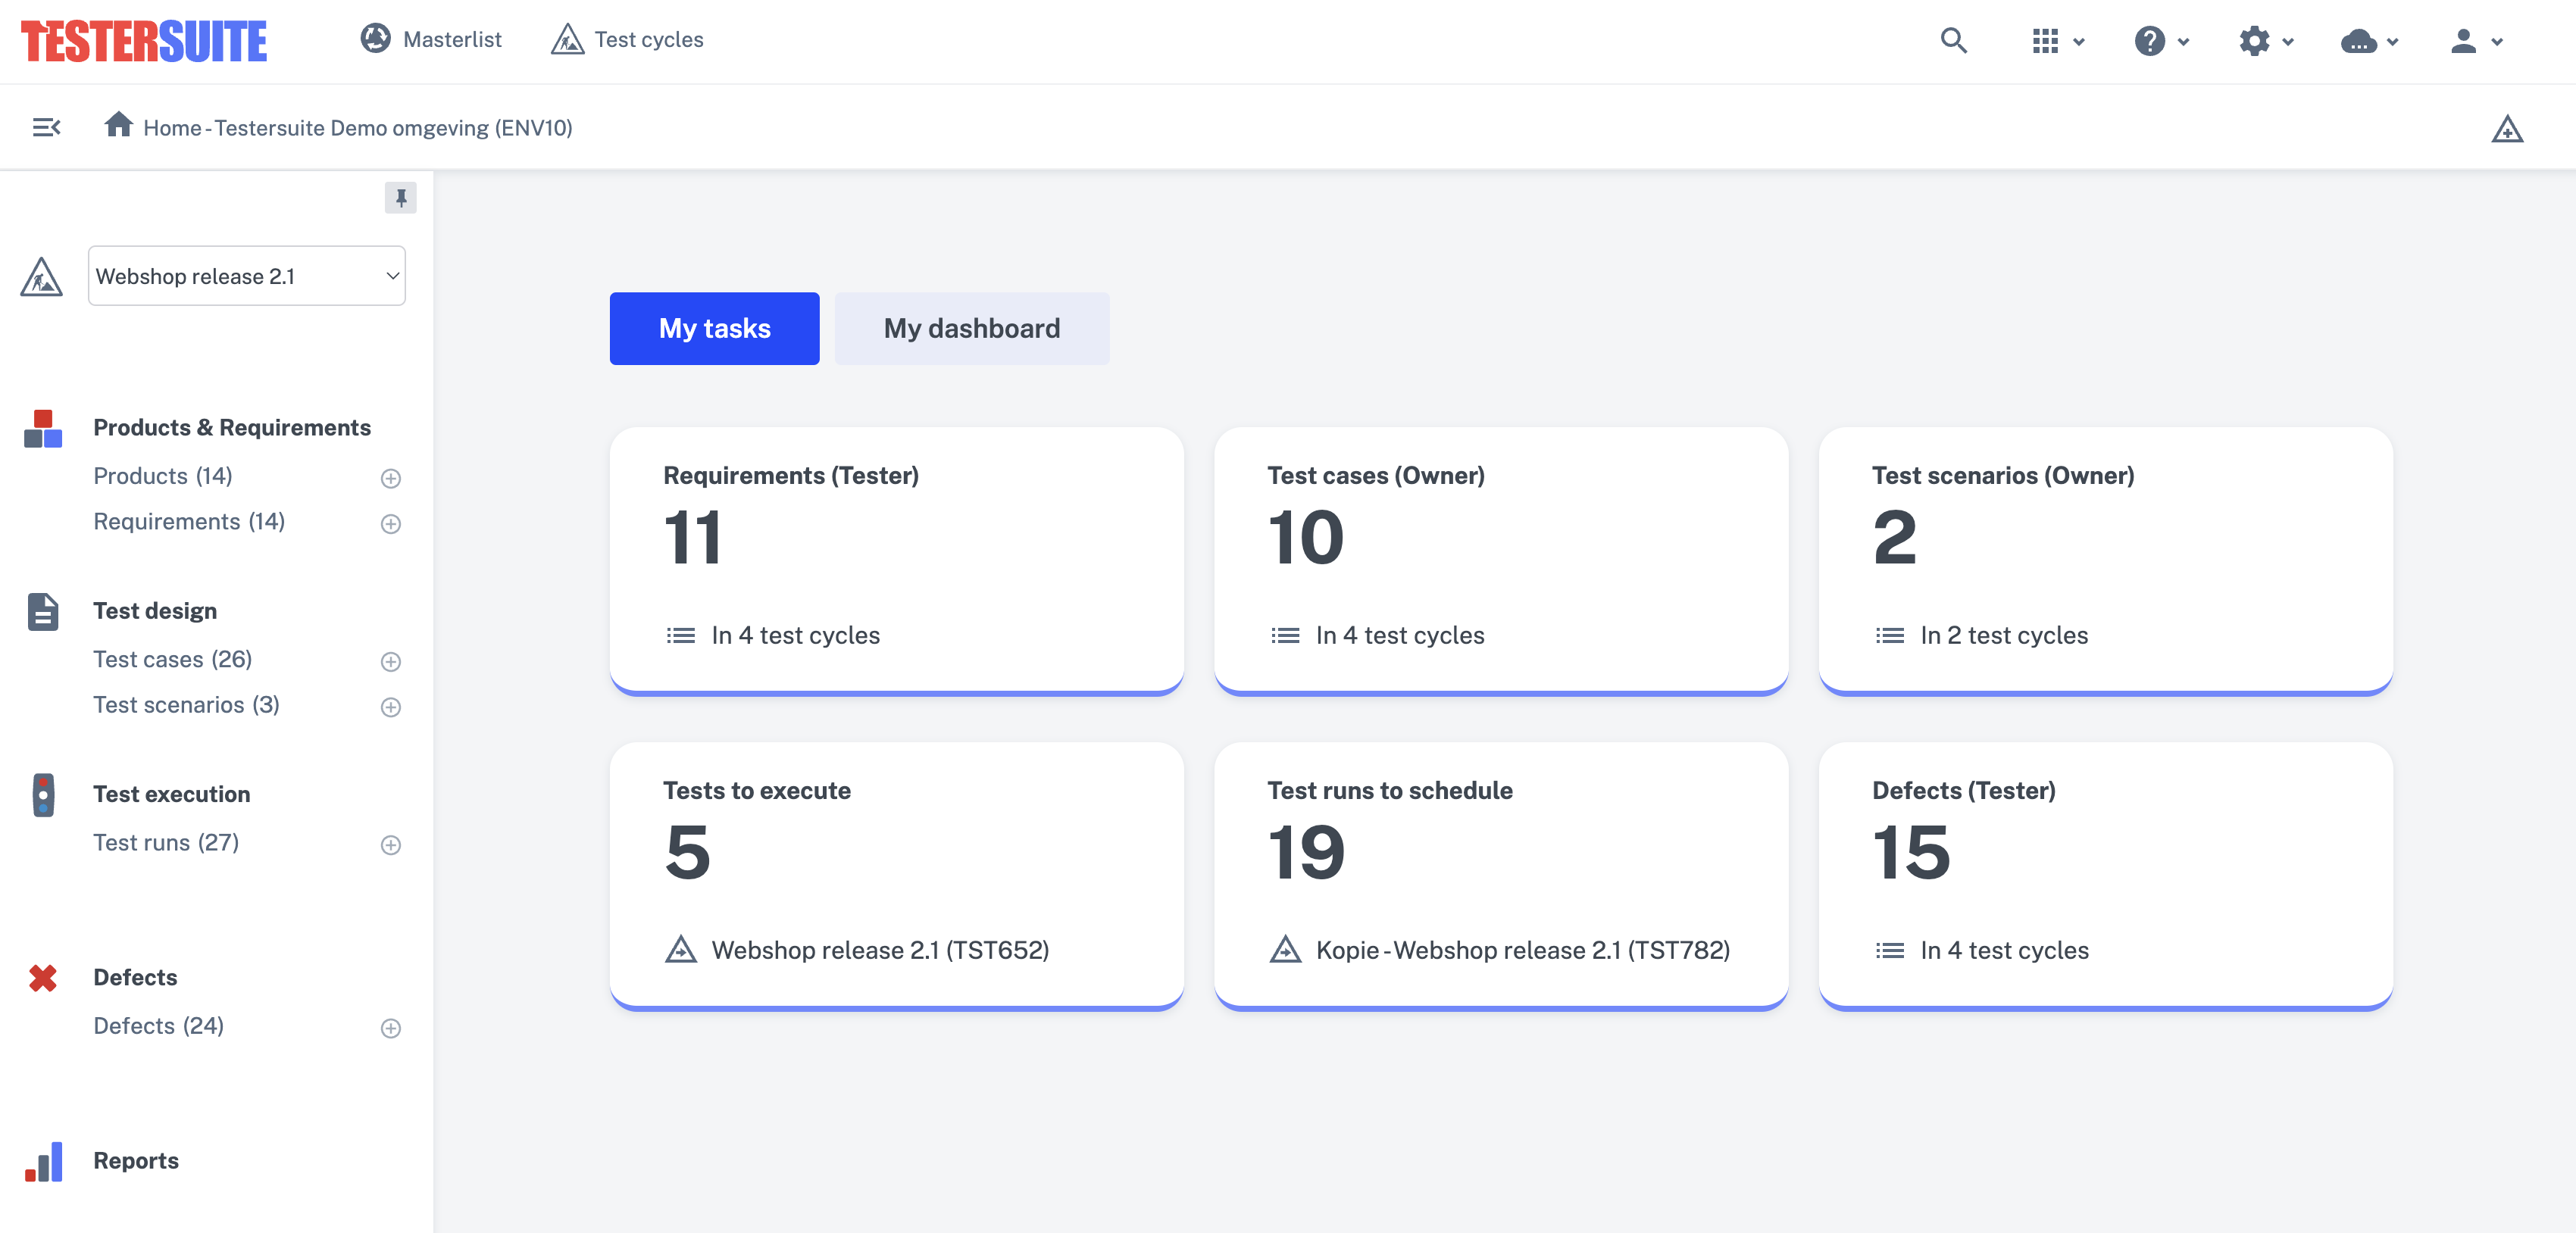
Home / Dashboard

After logging into Testersuite you will be taken to the dashboard (Home). In this screen you will find an overview of all the unfinished Test cycles you are participating in. You can return to the dashboard from any screen via Home in the Program Bar or by clicking on the Testersuite logo.

Icon Explanation

Closed Test cycles are not shown on the dashboard and can only be accessed via the Test cycles button at the top of the screen. This includes archived Test cycles and Test cycles with status Completed, Cancelled or Processed in Masterlist.


The dashboard is composed of the following three components:

  • My tasks: here are shown the tasks you have to perform in the Test cycles where you are a participant.
  • MY Test cycles (TESTMANAGER): here information is shown about the Test cycles where you are a participant and test manager.
  • MY Test cycles (PARTICIPANT): this displays information about the Test cycles where you are a participant (and not a test manager).

My tasks
Here you have a single view of your workload within the Test cycles where you are a participant. The set of tasks you see by default depends on your role in the current Testersuite environment. In addition, this piece is customizable. More information can be found here.

The image below shows the number of test cases and test scenarios you own:

In this example, you own eight test cases and two test scenarios. When you click '8 Test Cases (Owner)' the following lightbox opens:

This lightbox displays your test cases per Test cycle . For each Test cycle , the total number of test cases and the number of test cases per status are displayed. This way you have a direct view on the progress of your test cases (the test cases you own). From here you can click through to the test cases within the various Test cycles. For example your test cases in the Test cycle Webshop release 3.1 (TST305) that have the status Ready for test.

For running tests, the dashboard contains the task Run tests. In the following example, there are 16 tests you need to run. These are test cases in unfinished test runs that have been assigned to you or to group(s) you are in.

When you click on '16 Tests to be performed' the following lightbox will open:

This lightbox displays your tests to be run per Test cycle . For each Test cycle , the total number of tests and the number of tests per status are displayed. This gives you a direct view of the progress of your tests. In this example, in the Test cycle ODS Healthcare Institutions (TST539) you need to perform a total of seven tests. Four of the seven tests have not yet started and four tests are finished (has the status OK). One test has already been started, and three have been found to be Not OK.

From here you can directly click through to start running your tests. As a user, you can choose whether you want to run tests in the expanded view (click the blue Run button ) or in the simple view (click Run in Simple View).


Icon Explanation

If you usually use the simple view, you can indicate this in your user settings. The blue Run button will take you to the simple view. See here for more information about setting your preferences.


When you click Run in simple view behind the Test cycle ODS Care Settings (TST539 ) you will go to the next screen:

Here you can then go through your tests and enter test results.

MY Test cycles
Here the Test cycles are shown where you are a participant. A distinction is made between Test cycles where you are a test manager and Test cycles where you are not a test manager. One line is shown per Test cycle . At the top are the Test cycles that have started and below the Test cycles that have not yet started. Within that, it is sorted by start date (ascending).

If you click on the short description of a Test cycle , for example Webshop release 2.1 (TST305), then you go to the relevant Test cycle . If you click on a Test cycle line to the right of the short description, the line will open and the information tiles of the concerning Test cycle will be shown.

Initially, a basic set of tiles is displayed. It is possible to move (drag) tiles, to remove tiles and to change tile settings. When you hover the mouse over a tile, icons are shown in the top right corner to perform these actions.

It is also possible to add tiles. To do so click on the plus (+) sign behind the last tile. When creating a new tile you will be asked to set the information that should be shown in the tile. In the example below a new tile is created to show the number of defects per test environment. By checking the checkbox Standard tile the tile will be added to your standard set of tiles. This means that the tile will always be shown in Test cycles under 'My Test cycles (testmanager)'.

After clicking Create, the tile is added. If desired, this tile can then be moved to another location within the tiles of the unfolded Test cycle.

It is also possible to show only items for which you as a user have a certain role. For example, "I want to see the number of defects per test environment for the defects for which I am the practitioner." Click on the settings icon at the top of the tileĀ . Then fill in the field With me as the role Handler In.

After saving, the information in the tile will be updated. The title of the tile will change from 'defects per test environment' to 'My defects per test environment (handler)'.

It is also possible within the tiles to click directly to the items in the Test cycle:

When you move the mouse over a surface (status color) in the graph it will indicate which status it is and you can click through. In this example the list with defects with the status Retest is opened: