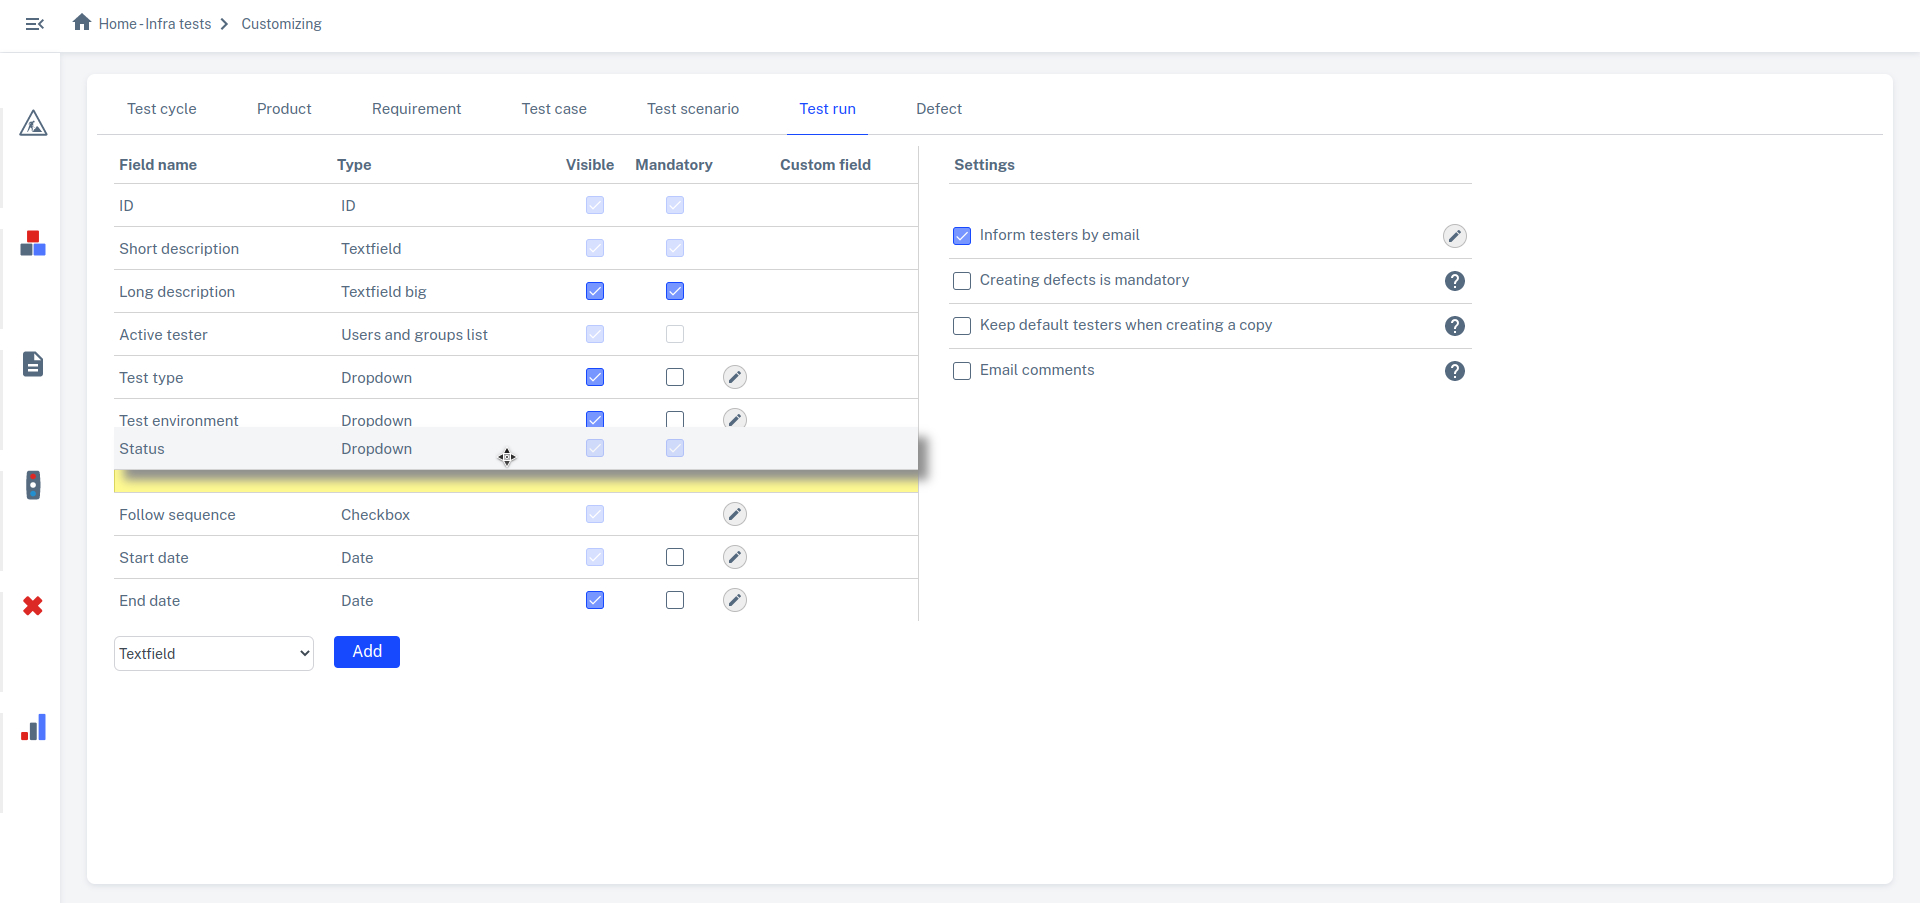
Testersuite can be completely customized to your organization's workflow. In the Customizing module, each entity (Test cycle, Product, Requirement, Test Case, Test Scenario, Test Run and defect) has a tab to configure the corresponding entity. The following customizations are possible:
- Creating new fields
- Modify field names
- Maintain values of drop-down lists
- Setting default (initial) values
- Set visibility of fields (Visible: yes/no)
- Set whether fields are mandatory (Mandatory: yes/no)
- Set in which order the fields should be displayed on the screen
In the Product tab, it is additionally possible to customize the risk matrix. To do so, click on the Risk Matrix button at the bottom of the screen. See also: risk-based testing
Creating New Fields
When you want to create a new field you must first choose a field type to the right of the Add button. In doing so, you can choose from the following field types: Text field, Text field large, Selection list, Multiple values, User list, Date and Checkbox. Then click on Add. A 'light-box' opens where you can enter the field names (Dutch and English). If the field is of type Picklist or Multiple values you can add or remove values and set the order of the values (using the drag and drop function).
Set default (initial) values
For fields of the types Dropdown List, Multiple Values, Date, Checkbox, and User List, you can specify the value that should be entered in the field by default:
- Selection list: default fill with a drop-down value
- Multiple values: default fill with one or more values
- Date: default fill with current date
- Checkbox: default on or off
- User list: By default, populate this with the user who created the entity, or a user from a user list associated with a related item. Learn more below.
Default values for user lists
In Customizing, you can set a default value for fields of the type “User Field” and “User and Group Field.” Here, you can choose either the current user or the value from a field in a related Testersuite . Custom fields are also available for this purpose. For example:
- By default, the "Handler" field for a new defect populated with the "Owner" of the related product
- The "Default Tester" field in a new test case is automatically populated with the "Tester" from the related requirement
- The "Handler" field for a new defect automatically populated with the value from the "Default Handler" custom field in the relevant Test cycle
Changing fields
Behind the fields that can be changed is a pencil button  Click this button to change the field.
Set Visibility
By turning the checkbox in the Visible column behind a field on or off, you can set whether a field should be shown on the screen. Turning on and off is saved immediately.
Set Required (y/n)
By enabling or disabling the checkbox in the Required column behind a field, you can set whether a field is required to be filled in or not. Turning it on and off is saved immediately.
Set order on screen
The desired order of fields on the screen can be set using drag and drop: