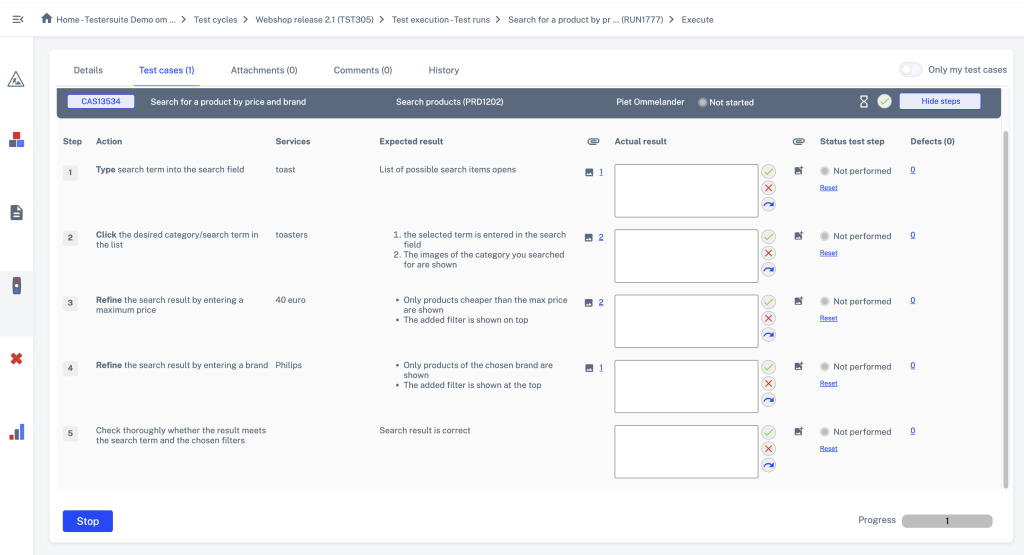
To run a test run, open the test run and click the Run button. Then the Testcases tab will open in "output mode. In the Tester column, you can see which test cases have been assigned to you. You may run these test cases. You may also run the test cases assigned to a group to which you belong.
First, behind the test cases you can run is the button with the green check mark (![]() ). You can use these to approve the test case at once.
). You can use these to approve the test case at once.
Next to it is the "Perform Steps" button. This allows you to open a test case and enter the test results for each test step.

Behind a test step you can enter the test result in the Result field. Behind each step there are three buttons to adjust the test step status:
![]() The test step is Ok (result is equal to expected result).
The test step is Ok (result is equal to expected result).
![]() The test step is Not Ok (result is not equal to expected result).
The test step is Not Ok (result is not equal to expected result).
![]() The test step will be Skipped (does not need to be implemented).
The test step will be Skipped (does not need to be implemented).
Reset allows you to reset the status of the test step to Not Performed.
When you click Not Ok then a 'lightbox' will immediately open to create a new defect at the test step you are running. See Test Run defects for more information on this.
When the test case statuses are changed, as described above, then the test case status adjusted. See further Test cases status for operation.
When the test case status changes, as described above, the test run status automatically updated. See further Test run status for the operation.

The Run button is disabled if a test run has no test cases or if a test run has the status Completed or Cancelled. If you still want to execute the test run you can do so in the following way:
1. Add a test step to a test case or add a new test case;
2. This automatically returns the status to Started;
2. The Run button is now enabled again.