A good testing process is characterized by a good balance between structured testing and 'Exploratory Testing'. Structured testing based on test cases and test scenarios has been well supported by Testersuite for years. In order to support Exploratory Testing as well, there is a separate (mobile) view with which testers can create defects quickly and easily. The basic principle is that first a screen print (or on a cell phone a picture) of the defect is made and then the description of the defect is added.
To switch to the view for Exploratory Testing, there is a menu of Apps at the top of the program bar. In this menu, click Exploratory Testing. After you launch the App, it is helpful to resize your browser and place it to the left or right of your screen. Next to it, you can then open the application you are going to test. This way you can easily switch between testing the application and entering defects.
On the home screen, choose a Test cycle within which to create a defect and click the Create New defect button .

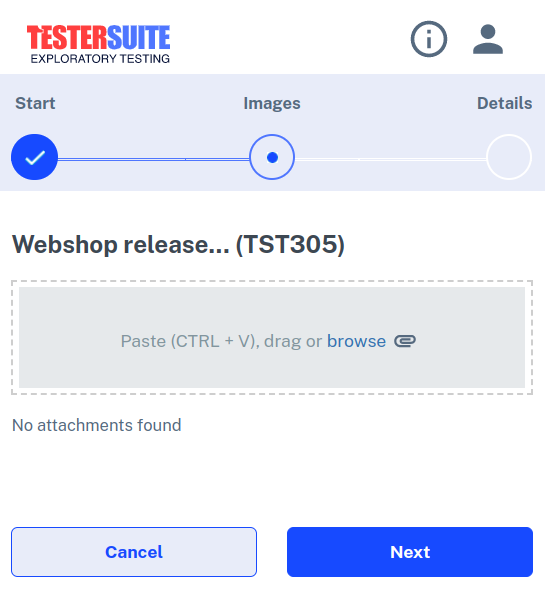
The next screen allows you to upload screenshots or images related to the defect .
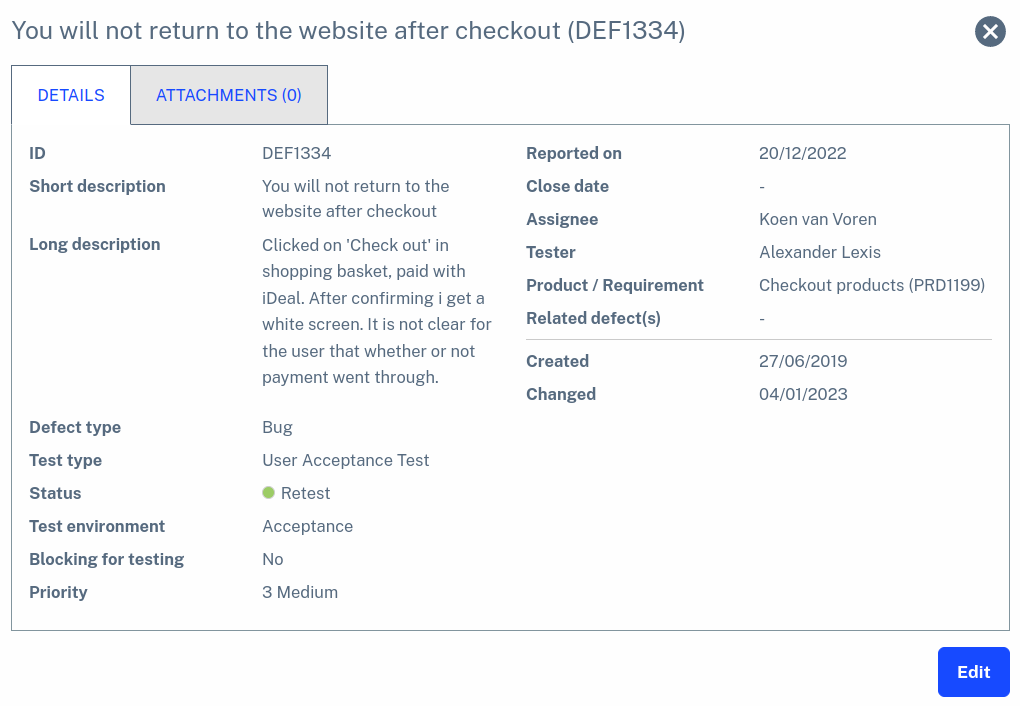
After uploading the images, click Next to go to the details screen. In this screen you can describe the defect , indicate the priority etc. If you also want to show the non-mandatory fields then choose YES at Show optional fields. If you only want to see the mandatory fields then select NO there .

At the bottom of the screen, click Save when you are finished. You will then return to the home screen and can proceed directly to enter the next new defect.
At the bottom of the home screen, you will see the last five defects created in the selected Test cycle . You can view the details of a defect or still change the defect by clicking on the corresponding line. The defect will then open.