In the first step of the import process, you upload your import file. This import file must meet a number of conditions. This page will help you create a correct import file. For the example on this page, an import file was chosen for test cases. However, the following applies to all types of items.
Download the sample file
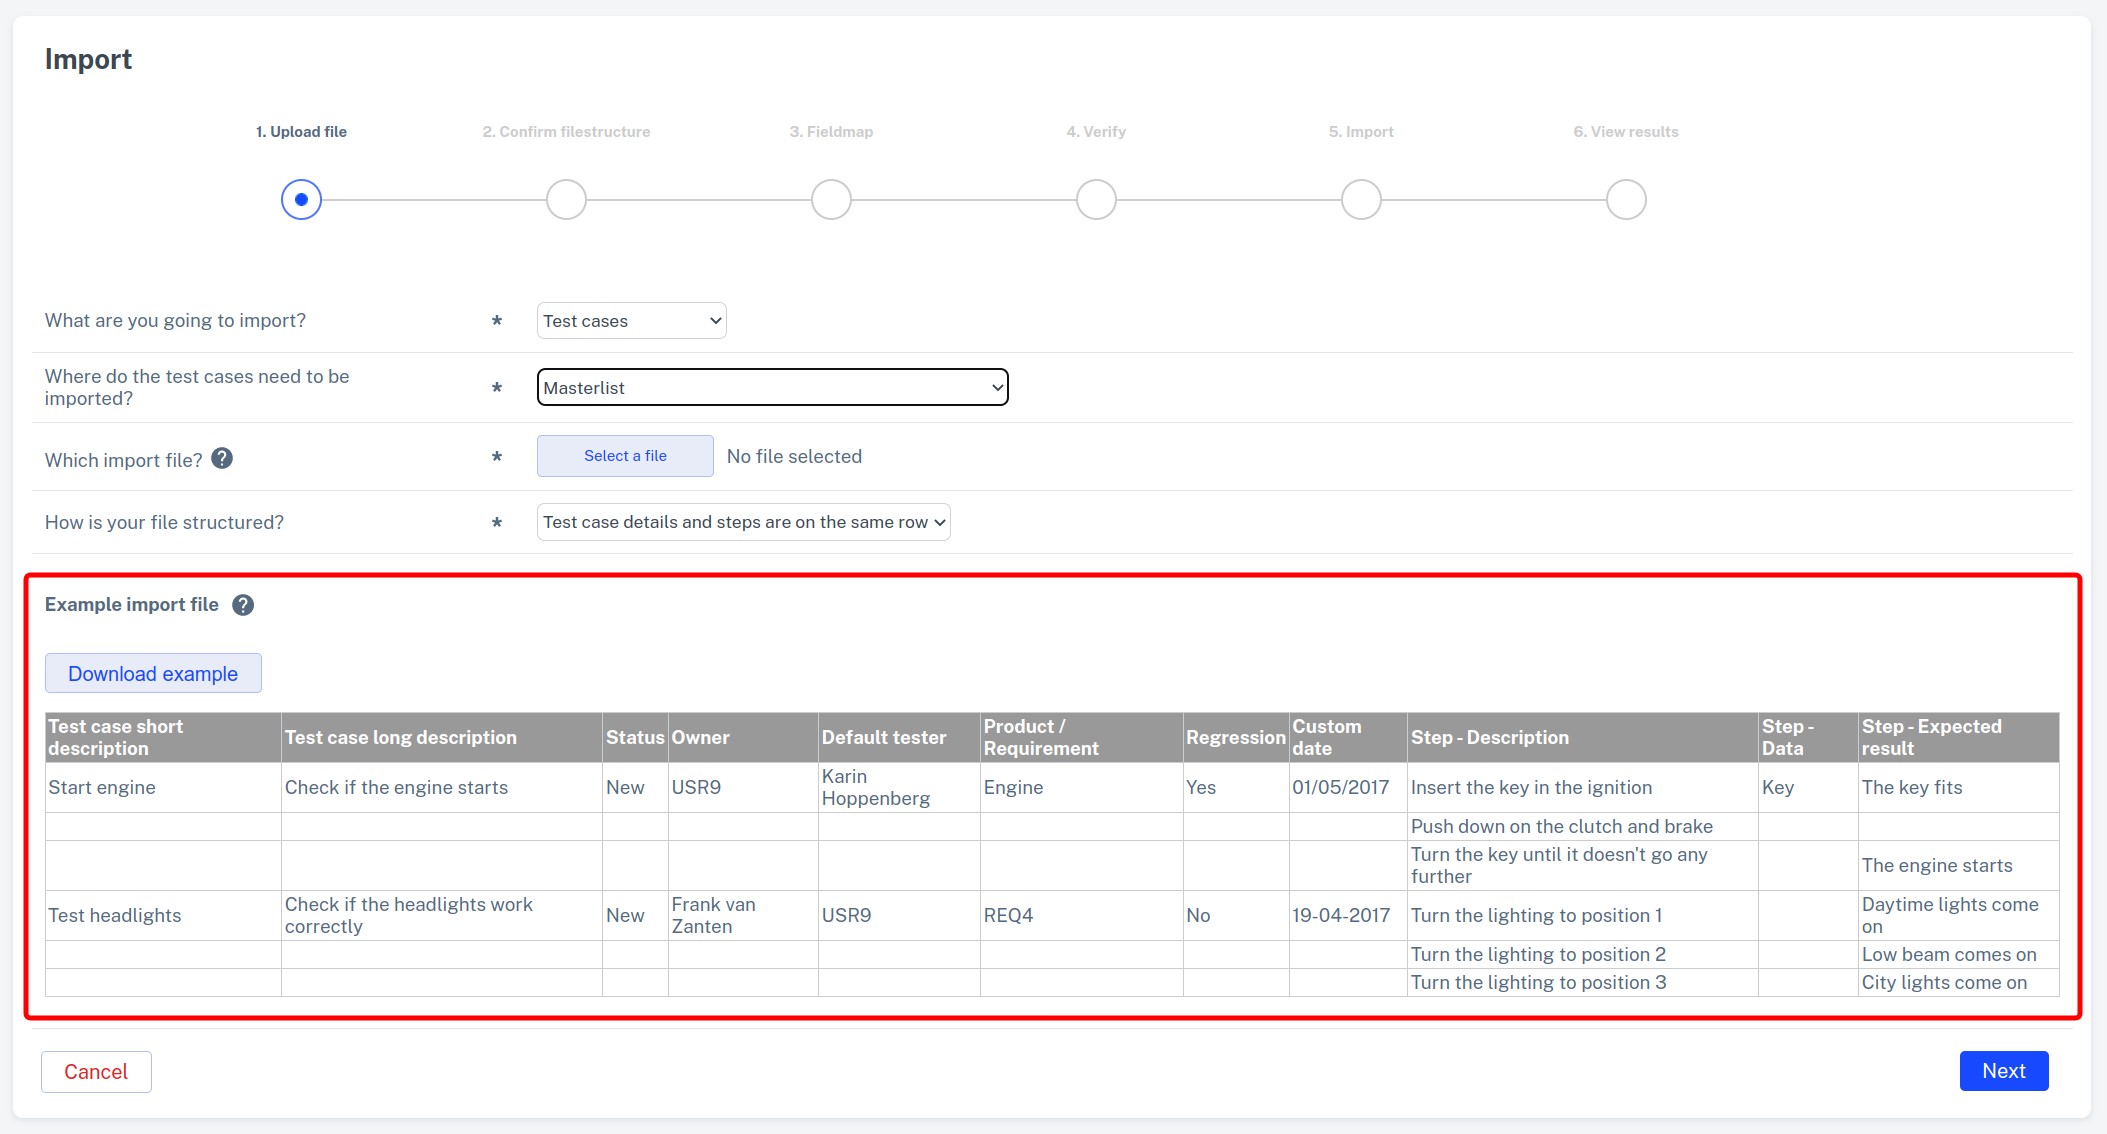
After choosing what to import, download the sample file that is shown. These sample files are formatted correctly for the import process. If you build on this, your import file will always read correctly. Make sure that your import file contains no formatting, and thus contains only plain text without color or formatting. Keep this in mind when copying data from another source into your import file.
Match the first row with Testersuite field names
Put the names of the fields you want to put your data in in the first row of your import file. Testersuite will try to match the data from this first row with the field names as you defined them in the customizing. Setting this up correctly in your import file will prevent the need for manual work later in the import process.
As shown below in the example, the test case import file contains additional columns for defining the description, dates and expected result for each test step.

Product requirement fields & user and group fields
If the items you're importing need to be a subitem of an existing product or requirement, you can define this in your import file. You can also specify which users or groups should be filled in the user and usergroup fields of the new items. Testersuite will recognize the following data in these fields:
- Product: ID or Short Description (for example, PRD25 or Application Item ABC)
- Requirement: ID or Short Description (for example, REQ27 or Functionality Requirement ABC)
- User: ID or full name (for example, USR86 or Frank van Zanten)
- Group: ID or group name (for example, UGR37 or E-Commerce testers)
