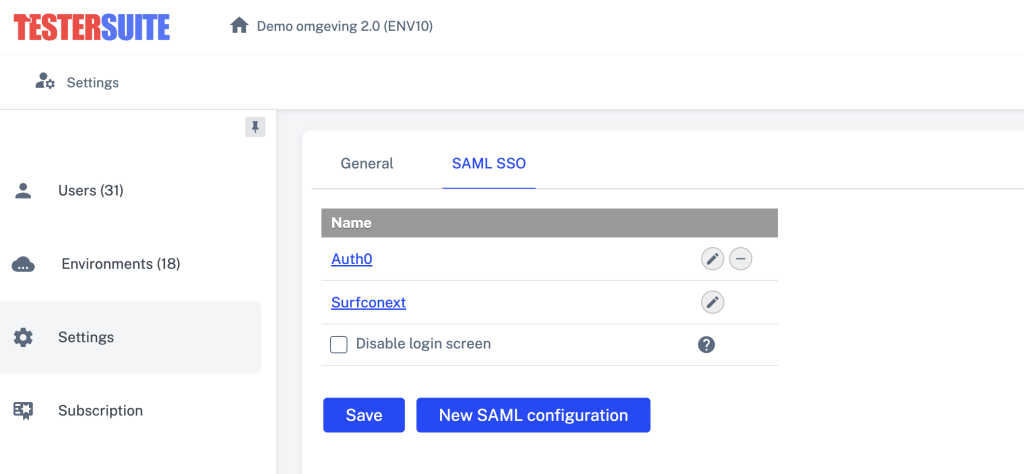
Testersuite biedt ondersteuning voor SSO (single sign on) via de SAML standaard. Dit werkt door het matchen van een gebruikersnaam aan de kant van een SAML Identity Provider met de gebruikersnaam in Testersuite. Testersuite werkt niet met user provisioning. Daarom dient een gebruiker die SSO wilt gebruiken altijd aangemaakt te worden in Testersuite.
De instellingen voor het gebruik van SAML SSO vind je in de Administrator portal onder Instellingen
Wat heb je nodig om Single Sign On te implementeren in Testersuite?
- Een Testersuite Professional of Premium abonnement
- Toegang tot de Testersuite administrator portal
- Een werkende SAML 2.0 identity provider (bijvoorbeeld ADFS, Microsoft Entra ID of Auth0). Dit is de dienst die je wilt gebruiken om via SSO in te loggen in Testersuite
- Basiskennis van SAML en het instellen daarvan
Een nieuwe SSO configuratie aanmaken in Testersuite
- Ga in Testersuite naar Administrator portal -> Instellingen -> SAML SSO (tab)
- Klik op Nieuw. Er wordt een formulier getoond met de volgende velden:
- Enabled: Vink dit veld aan om je connectie te activeren. Hiermee verschijnt er een SSO link op het Testersuite inlogscherm van je gebruikers.
- Name: Geef de SSO configuratie een naam. Deze naam zal de tekst zijn voor SSO link op het inlogscherm.
- Sp certificate en Sp key: Gebruiker een tool als Samltool.com om een nieuw X.509 certificaat aan te maken. De velden State/Province Name, Organization Name en Common Name zijn verplicht. Wat je hier precies invult is niet belangrijk, maar deze velden zijn wel verplicht om het certificaat te genereren. Stel een verre vervaldatum in om onderhoud te voorkomen. Stel geen passphrase voor de private key. Vul de Sp certificate en Sp key velden in met de verkregen informatie.
Zoek en download of open het Metadata XML bestand aan de kant van je identity provider. Gebruik de data uit dit bestand om de rest van de velden van het formulier te vullen. Hieronder vind je voor elk veld waar in het XML bestand je de benodigde informatie kan vinden.
- Idp entity id: Het ID van de identity provider
- XML veld EntityDescriptor entityID
- Single sign on service location: De locatie waar login requests heen worden gestuurd
- XML veld SingleSignOnService Location
- Idp username attribute: Het attribuut aan de kant van je identity provider, welke overeenkomt met de inlognaam van de gebruikers in Testersuite. Dit kan bijvoorbeeld het emailaddress of givenname attribuut zijn. Als het gewenste attribuut niet aanwezig is in het metadata XML bestand, dient deze eerst aangemaakt te worden aan de kant van je identity provider.
- XML veld Attribute Name OF XML veld auth:ClaimType Uri
- Idp certificate
- XML veld X509Certificate
- Idp sign metadata: Sommige identity providers vereisen dat de metadata wordt ondertekend. Vink deze optie aan als dit het geval is.
Na het instellen van deze velden sla je de configuratie op. Gebruikers kunnen daarna inloggen via de door jou aangemaakte SSO link op het Testersuite inlogscherm.
Kom je er toch niet uit en heb je hulp nodig? Neem dan gerust contact op met support@testersuite.nl