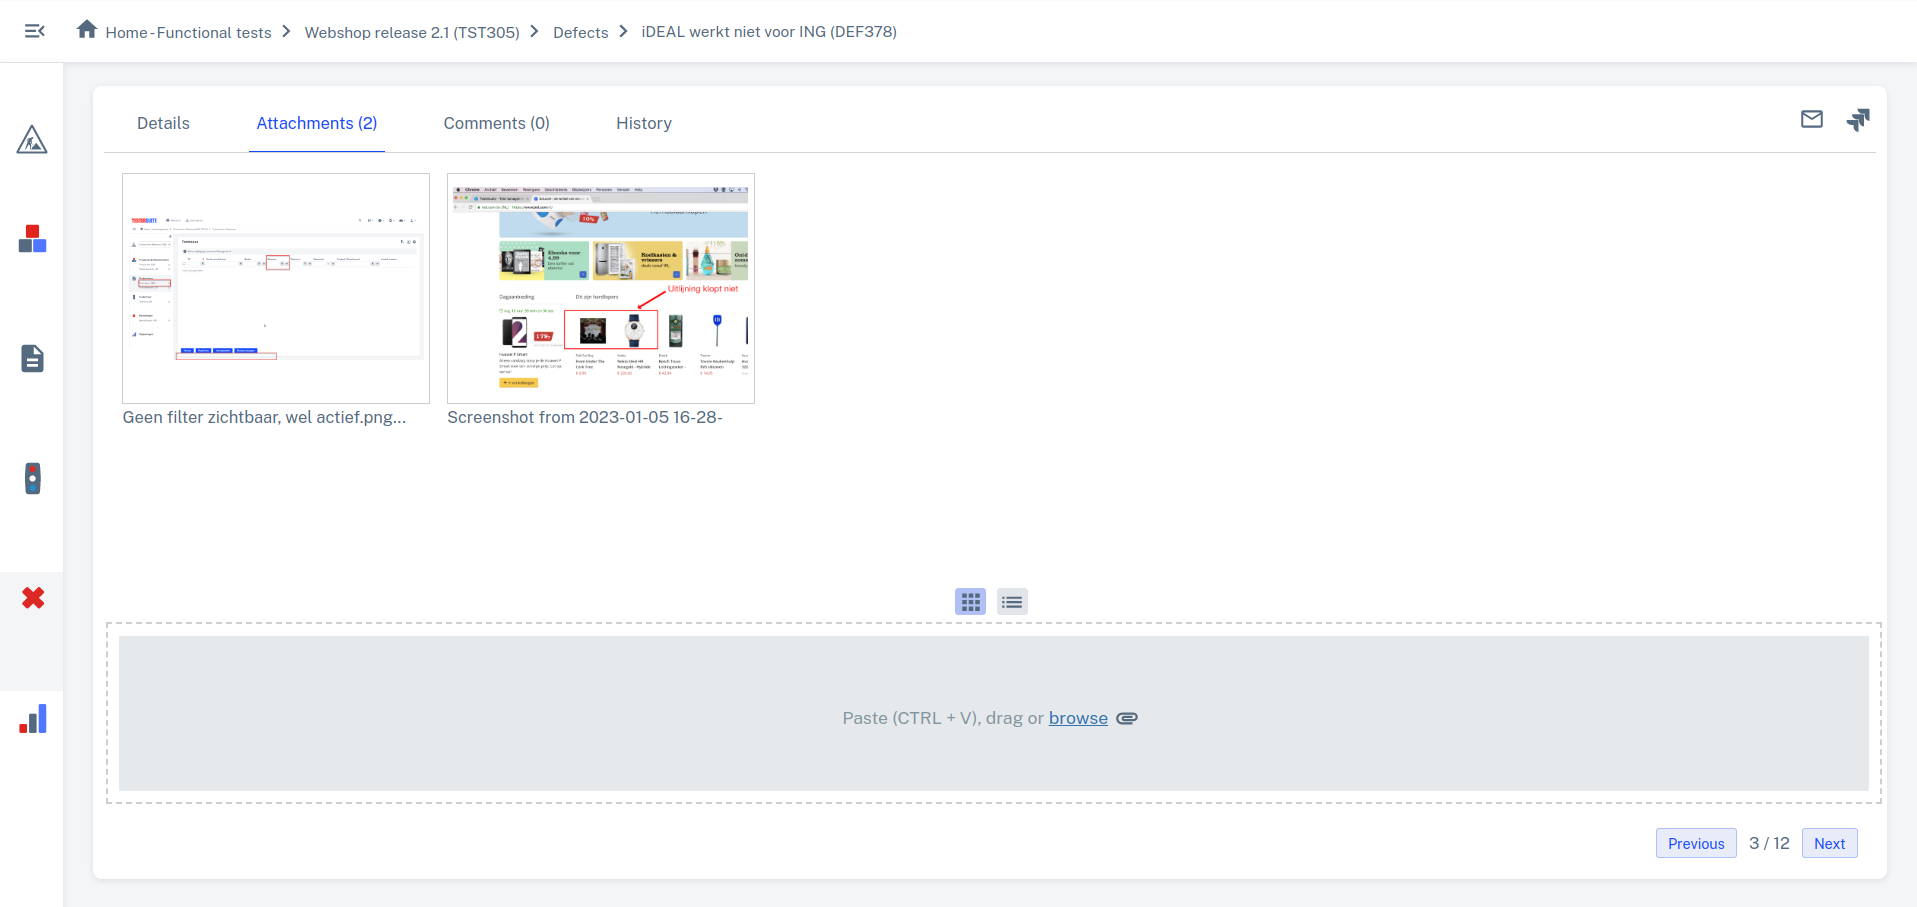
In the Attachments tab, you can upload files and edit images. Attachments can be displayed in a list or as tiles. When the Attachments tab is opened the tile view is initially shown. You can then switch between list view and tile view at the bottom of the tab. When you switch to another view, for example the list view, this is saved in your user settings. From then on, the list view is shown in that location by default.
Add Attachments
There are three ways to add attachments:
- In the gray area, click Browse. In the file explorer that opens select the files you want to add click Open.
- Open your computer's file explorer (you can also do this by clicking browse in the gray area). Drag the file you want to attach to the gray area with the dotted line around it (at the bottom of the screen). When you release the file there, the file will be attached as an attachment.
- Make a screen print, click in the gray area and paste the screen print using Ctrl+V (Windows) or Cmd+V (Mac). The image is added and opens immediately for editing.

If your browser is not compatible with the screen print function (way 3) then the paste (Ctrl-V or Cmd-V) option is not shown in the gray area.
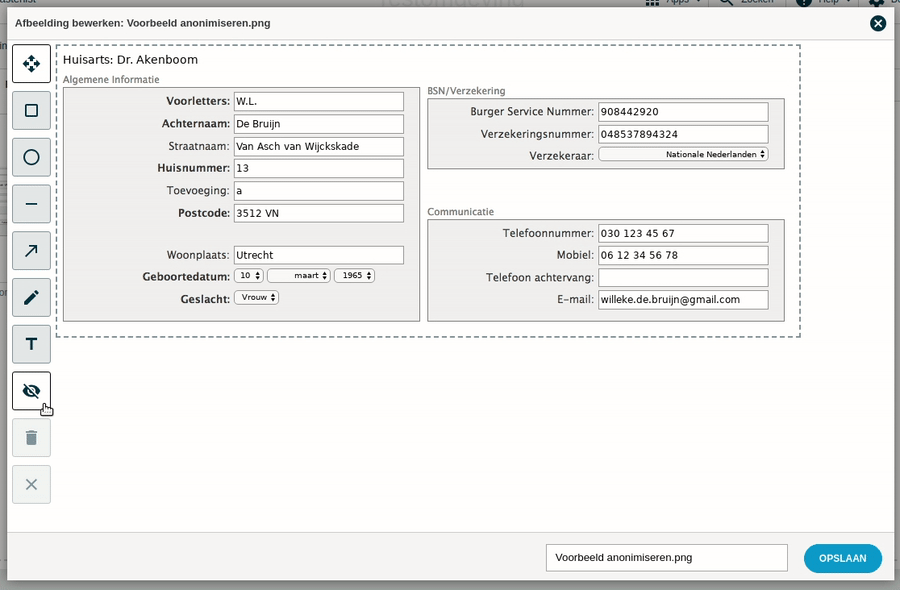
Anonymizing personal data
Under the Data Protection Act, the General Data Protection Act (GDPR), the privacy of individuals must be taken very seriously. The data used for testing should of course be anonymized but in practice this is far from always the case. This means that screenshots of test results may contain real personal data.
The image editing lightbox includes a feature to quickly and easily anonymize personal data in screenshots. When you go to edit an image you will see on the left side a button to anonymize. This animation shows how anonymizing data works:
Browsing through attachments
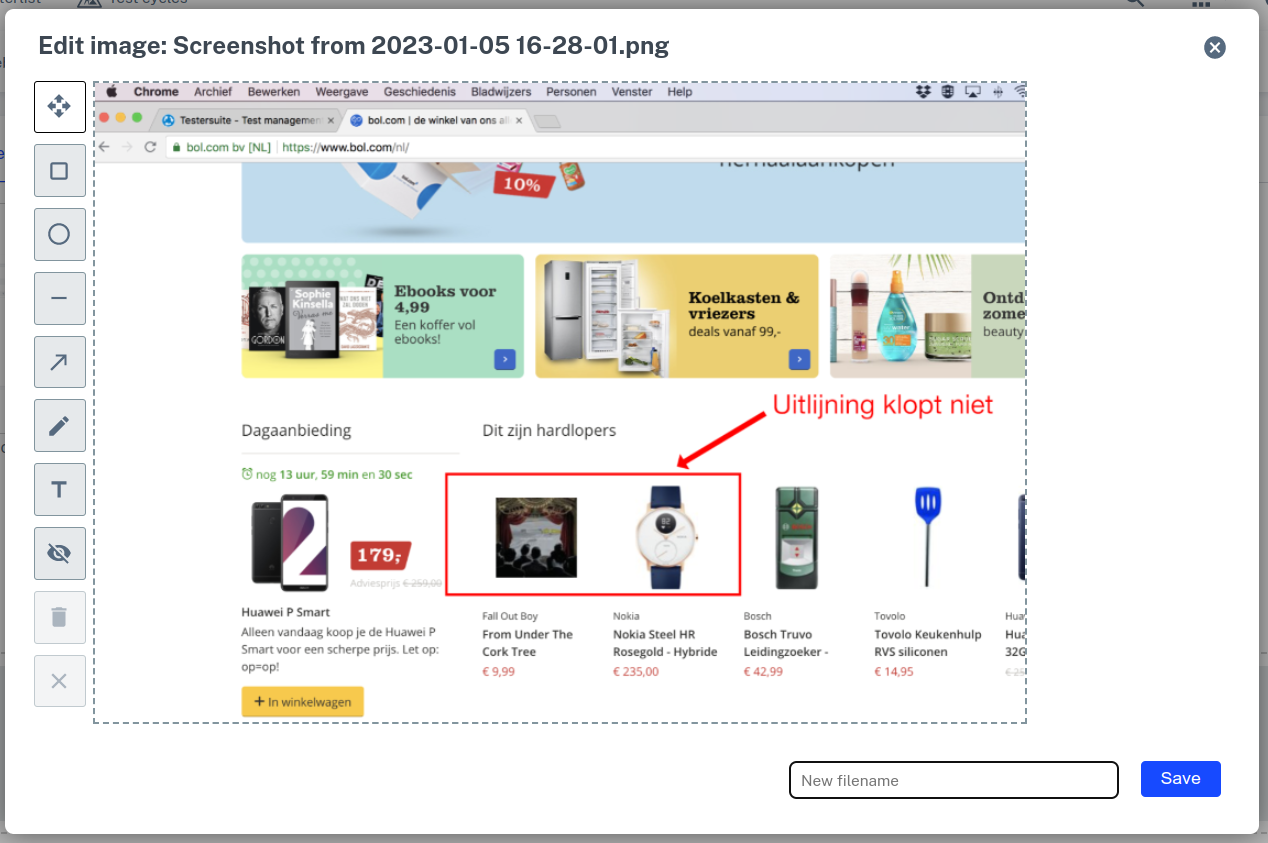
After opening an attachment, it is possible to browse through attachments (images). In the lightbox for displaying images this can be done with the previous and next icons.
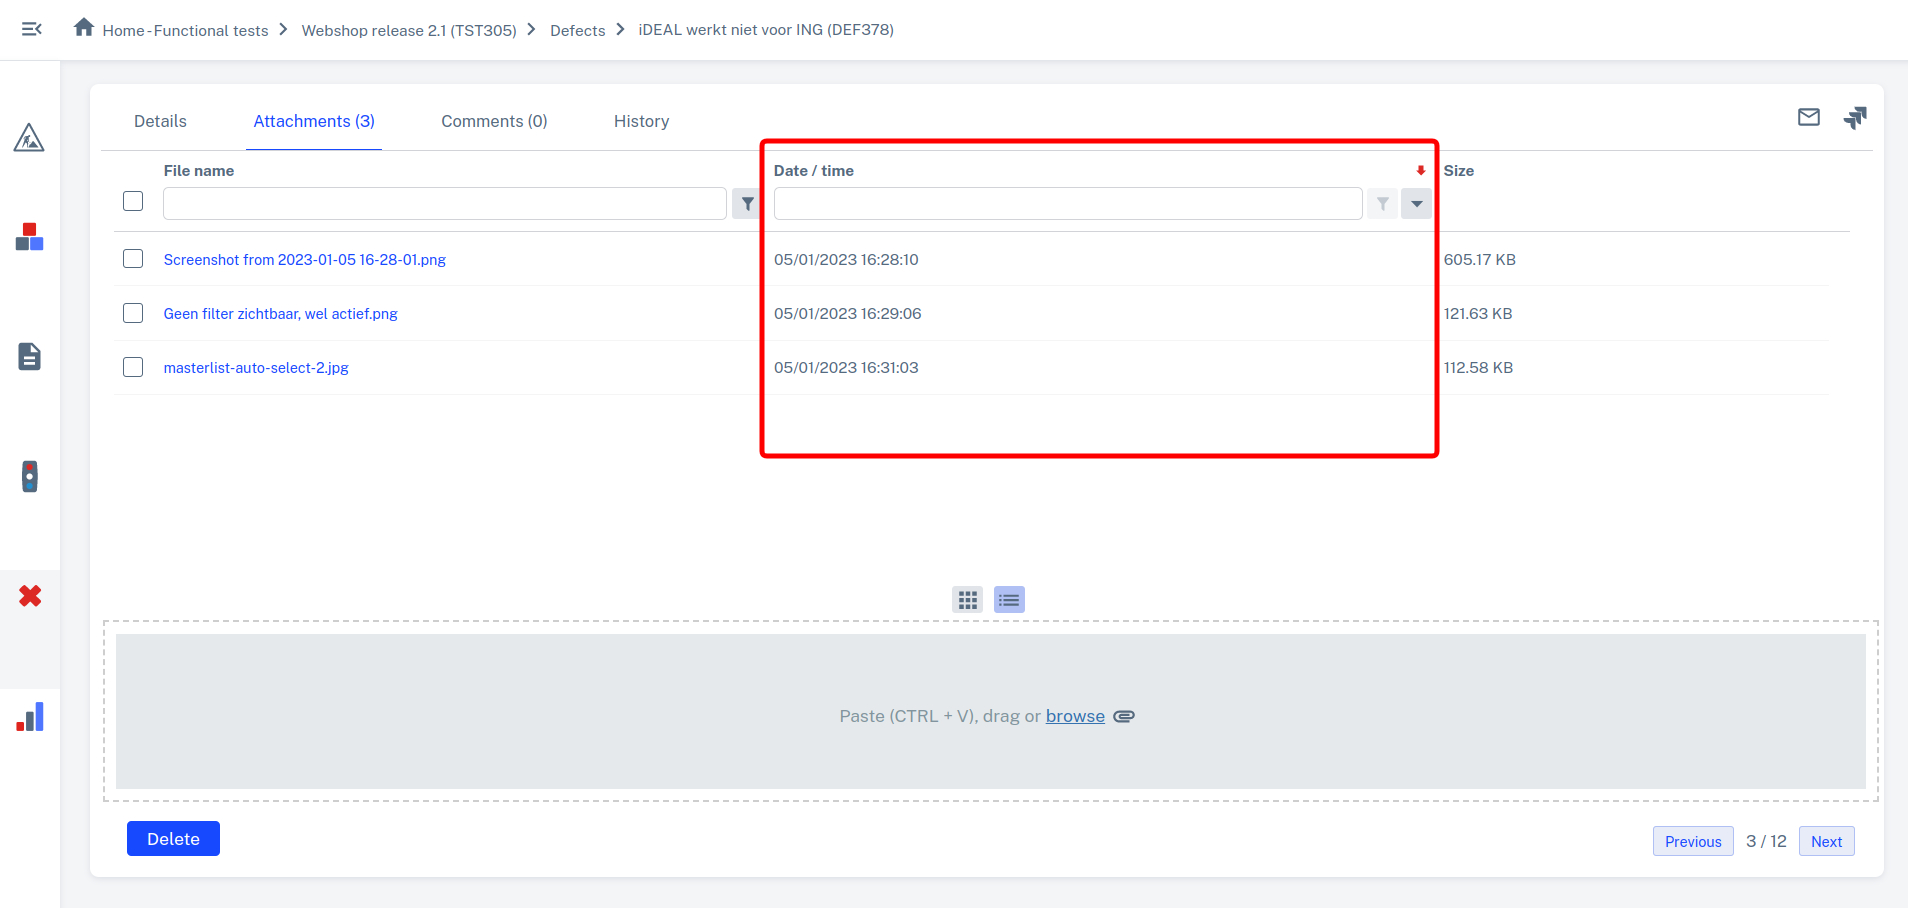
The order of the images is determined by the order in which the list of attachments is sorted. This list is run from top to bottom. In the following example, it is sorted by the date/time column. The list is scrolled with next/previous from top to bottom.
The maximum file size for uploading attachments is 15Mb. Files larger than 15 Mb cannot be attached.