Setting up user provisioning from Entra to Testersuite is very simple. Below is a step-by-step guide.
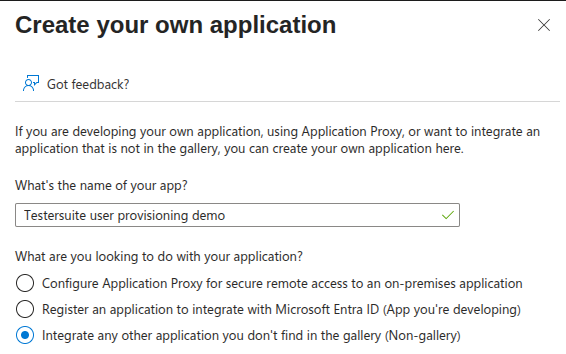
1. Create an enterprise application
Create a new enterpriseapplication in Entra. For the question “What are you looking to do with your application?”, select the last option:
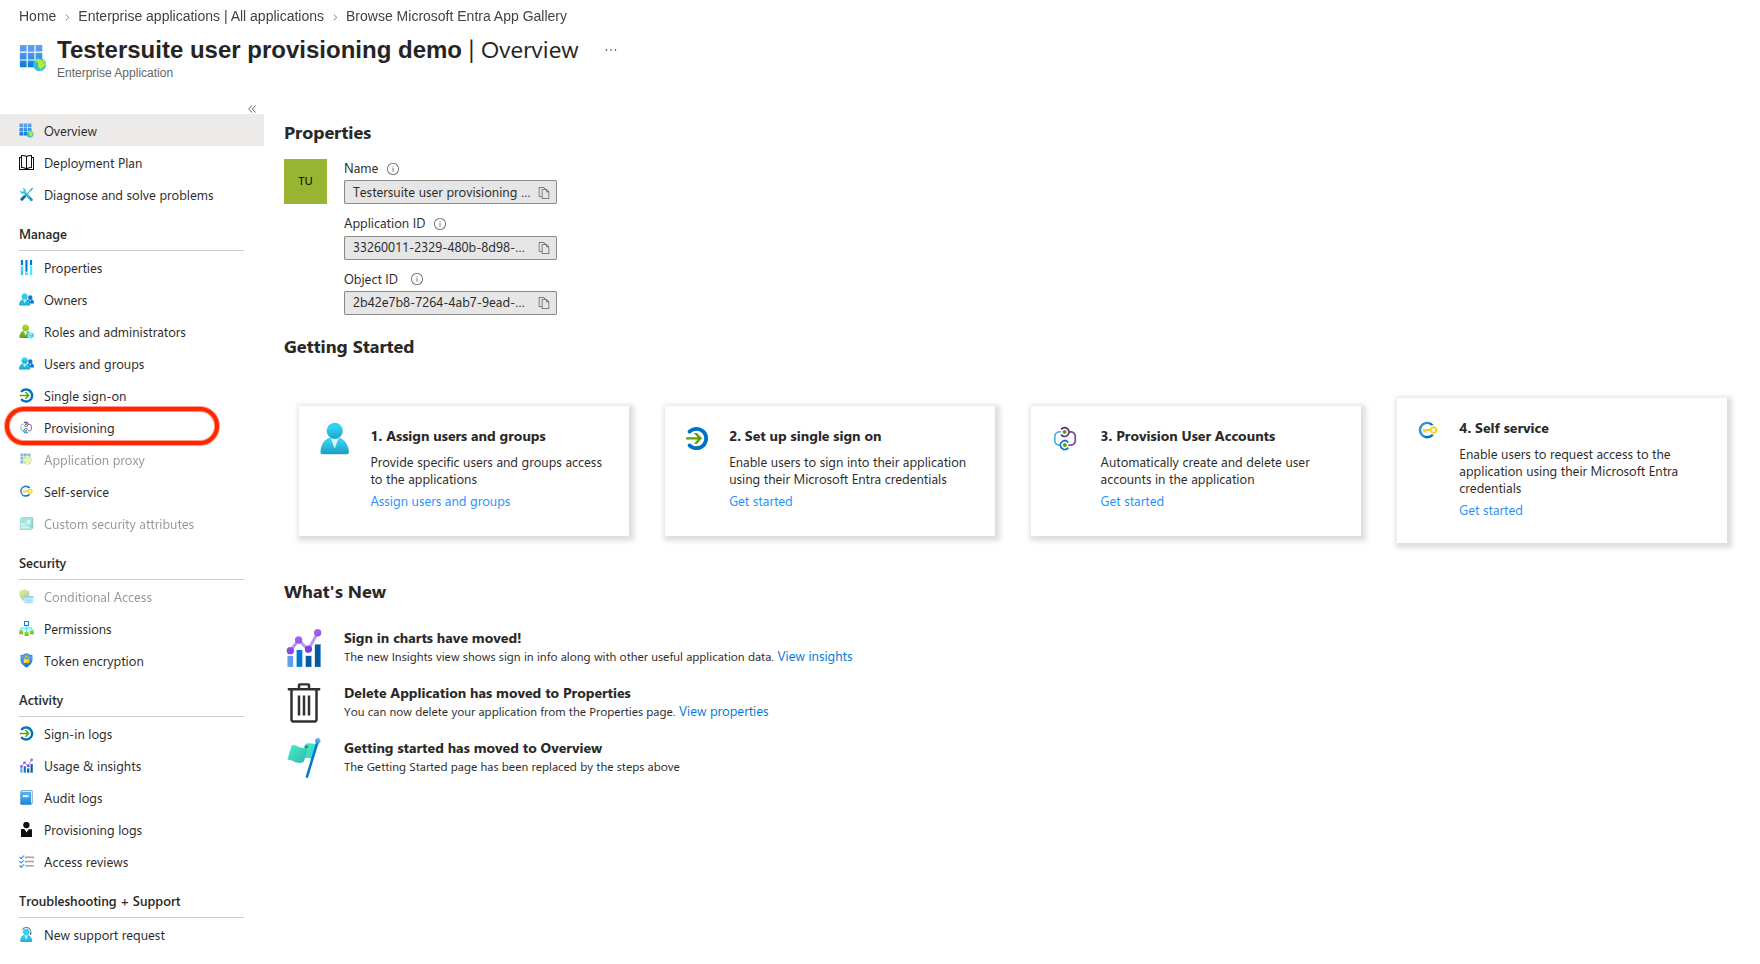
2. In your enterprise application, go to the “Provisioning” tab:
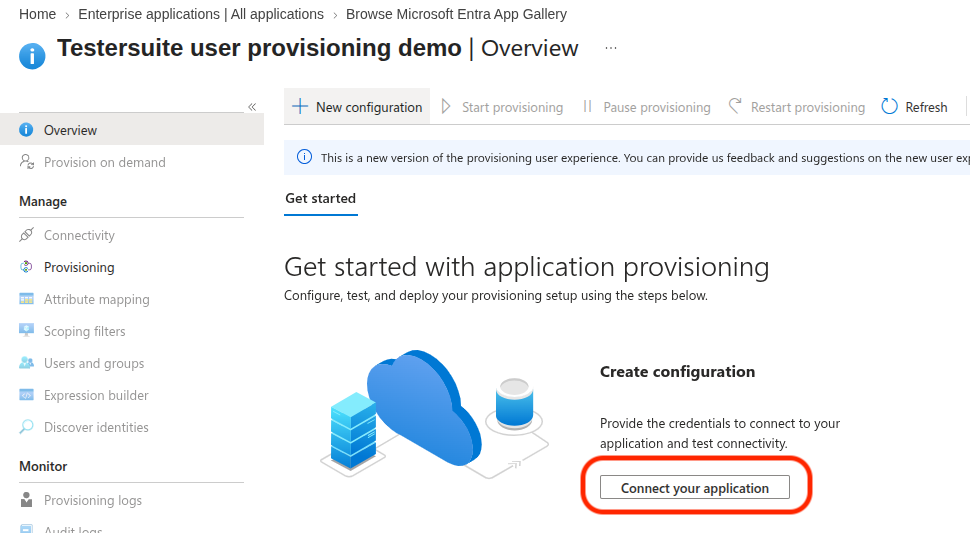
3. Under “Create configuration,” click “Connect your application”:
4. Enter the following information in the appropriate fields
Tenant URL: https://TESTERSUITE DOMEIN.scim.testersuite.com/v2?aadOptscim062020
Secret token: The personal access token created at Testersuite
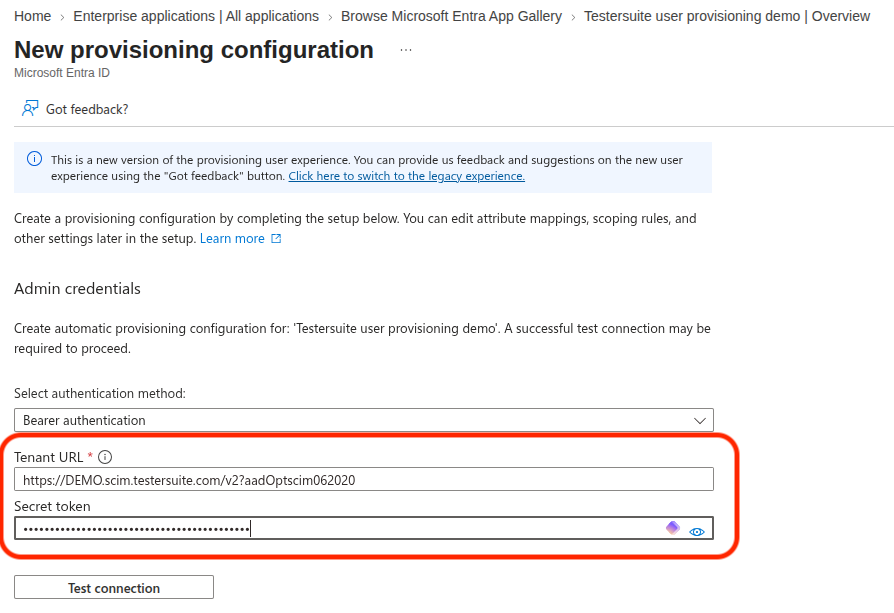
Test the connection by clicking the “Test connection” button. If the connection is successful, save your settings.
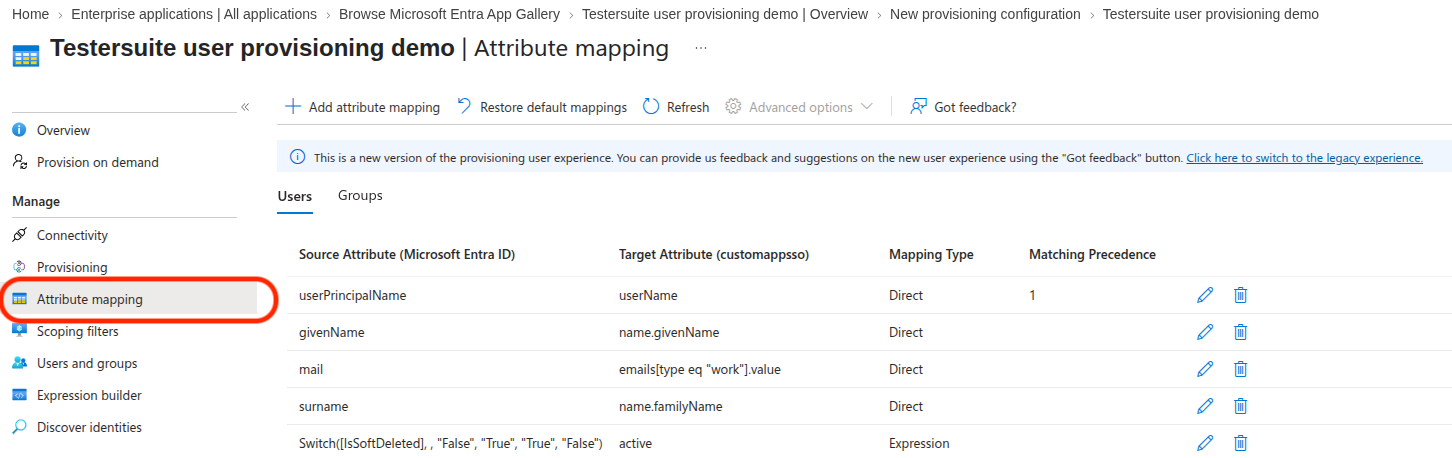
5. Attribute mapping
Go to Provisioning -> Attribute mapping and make sure the attributes listed below are present. Other attributes can be removed.
6. Disable Groups
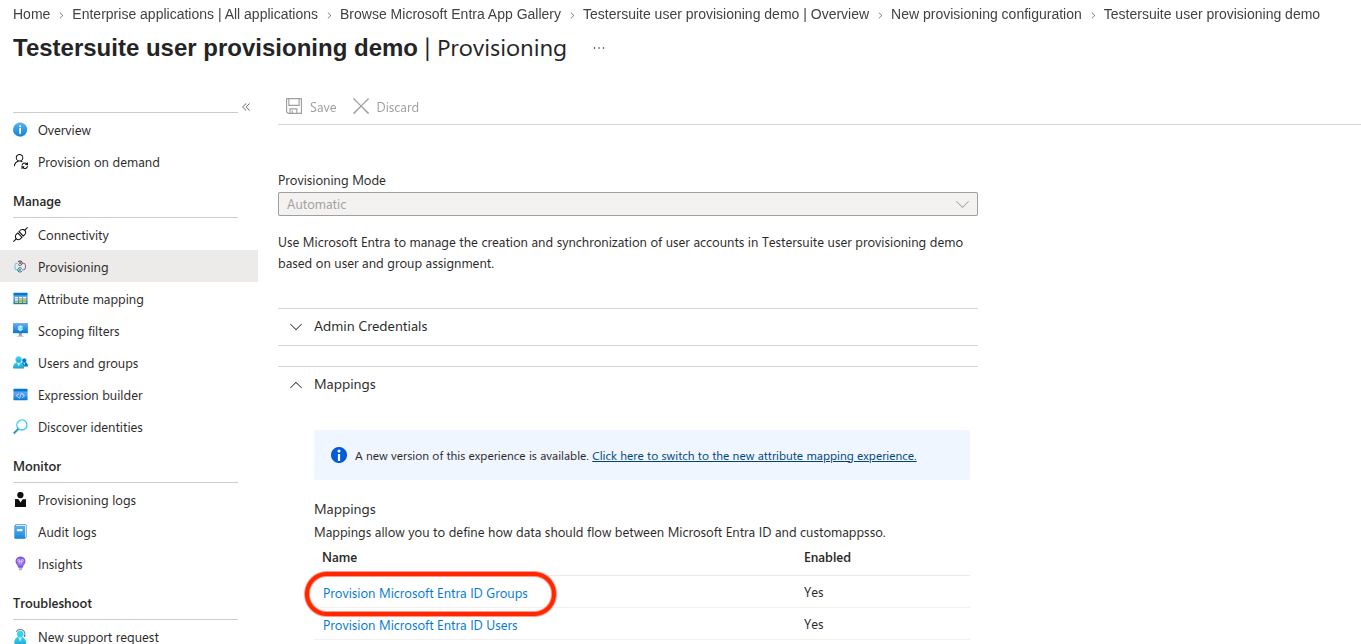
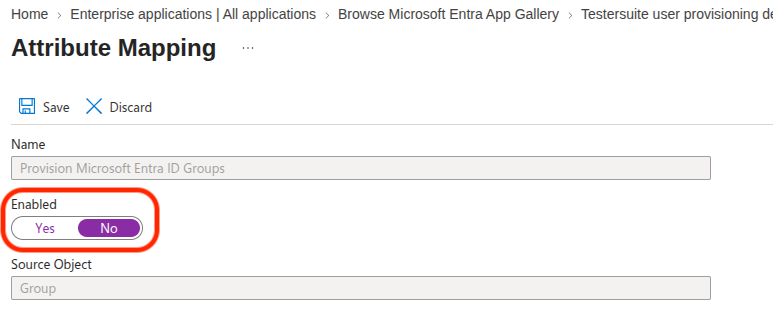
Testersuite offers user provisioning only for individual users via the SCIM protocol. Support for groups can therefore be disabled.
Go to Provisioning -> Provision Microsoft Entra ID groups:
Set "Enabled" to "No" and save:
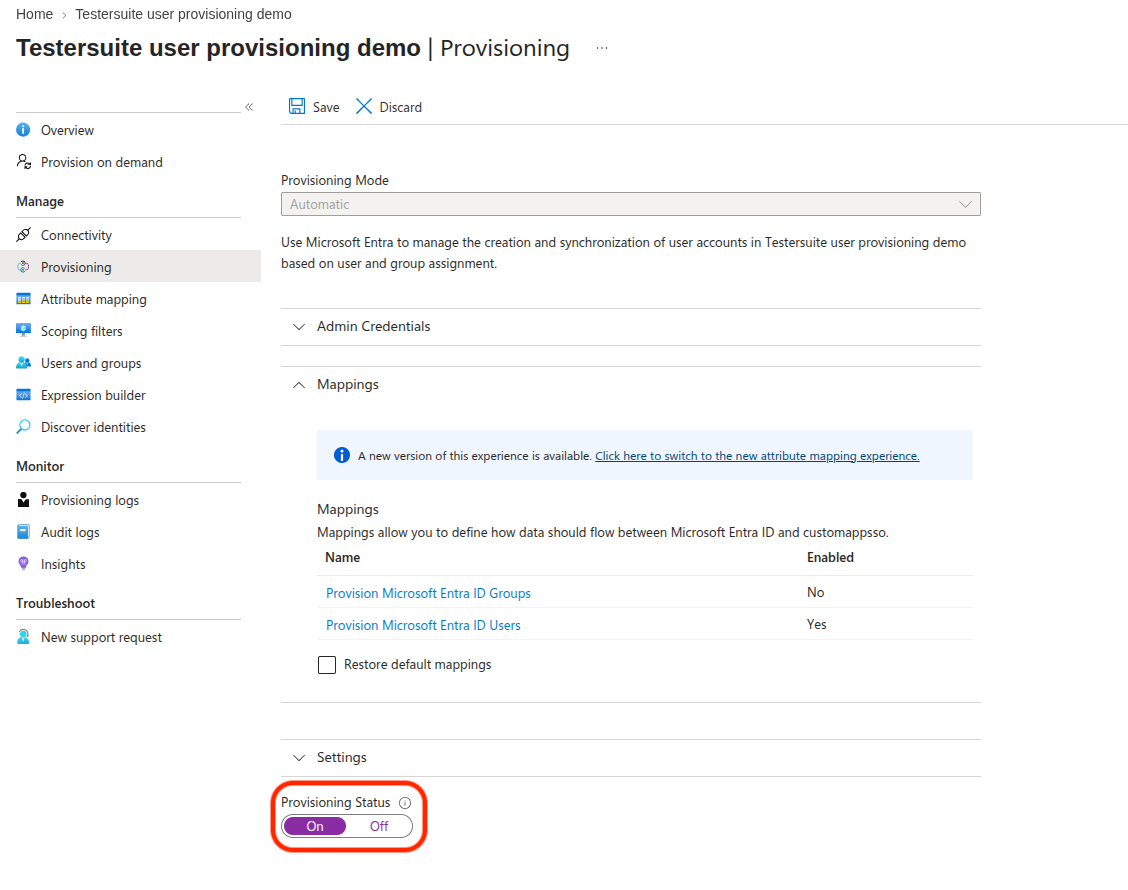
7. Enable provisioning
In the “Provisioning” tab, set the “Provisioning status” to “On” if you haven’t already done so:
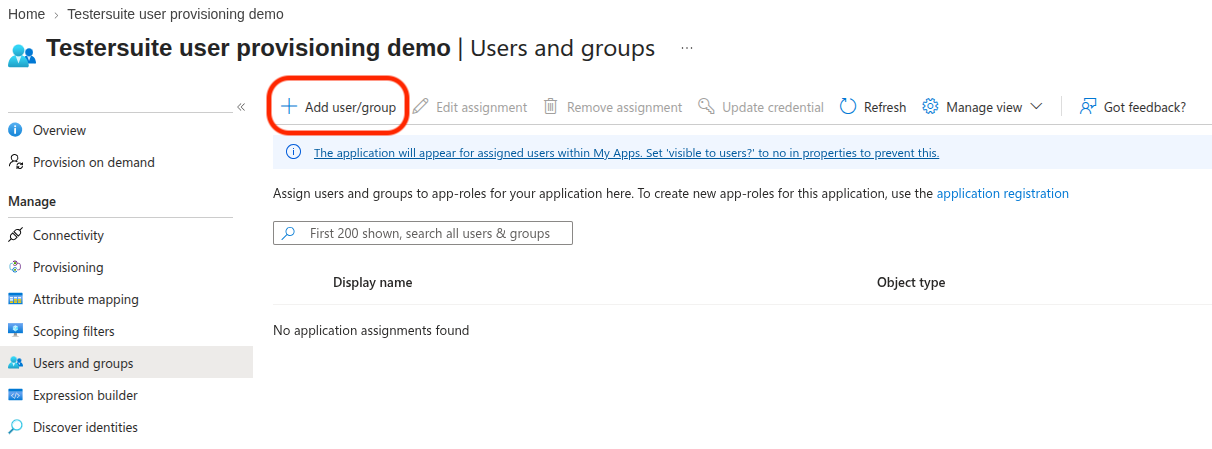
8. Add users
The integration is complete; you can now add Entra users under "Users and groups" -> "Add user." Added users are created in Testersuite as new users. On the Testersuite side, these users will still need to be assigned to the desired environments and given a role.